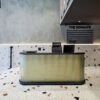
Achieving a smooth and sturdy base is crucial for the success of a poured terrazzo floor. Not sure what we mean by a poured floor? Read our explainer article here. Poured terrazzo is a composite material consisting of chips of marble, quartz, granite, or other suitable materials mixed with a cement or epoxy binder. As the term suggests, this mixture is poured on to the pre-prepared floor and levelled to create a smooth, seamless surface. Prepping the sub floor prior to pouring the floor is critical to the success of the poured floor.
Here’s a step-by-step guide on how to prepare the base before pouring terrazzo:
1. Surface preparation:
Clean the subfloor: Ensure that the subfloor is clean, dry, and free from any debris and dust. A clean surface provides a better bond for the terrazzo mix.
2. Repair any damage:
Fill cracks and holes: Inspect the subfloor for any cracks or holes. Fill these imperfections with a suitable patching compound or mortar. It’s essential to have a smooth and level surface to prevent any irregularities in the finished terrazzo.
3. Levelling and sloping:
Check for levelness: Use a level to check the flatness of the subfloor. If there are uneven areas, they should be addressed to ensure an even terrazzo surface.
Create a slope for drainage: In areas where water drainage is necessary, ensure that the subfloor is sloped appropriately to prevent water pooling. This is particularly important in bathrooms and kitchens.
4. Moisture barrier:
Install a moisture barrier: Depending on the location and the type of subfloor, it may be necessary to install a moisture barrier. This helps prevent moisture from reaching the terrazzo mix, which could compromise its integrity over time.
5. Install reinforcement:
Add mesh or reinforcement: In high-stress areas or where additional strength is needed, consider embedding a mesh or reinforcing material in the subfloor. This enhances the overall durability of the terrazzo.
6. Priming:
Apply a primer: To enhance the bond between the subfloor and the terrazzo mix, apply a suitable primer. This is especially important when working with cementitious terrazzo mixes.
7. Layout and design planning:
Plan the layout: Before pouring the terrazzo mix, plan the layout and design of the floor. Determine the arrangement of colours and aggregates to achieve the desired aesthetic effect.
8. Forms and Edge Restraints:
Install forms: Use forms or edge restraints along the perimeter of the area to contain the terrazzo mix during pouring. This helps create clean and defined edges.
9. Mixing and pouring:
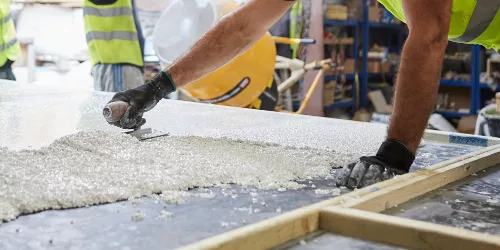
Prepare the terrazzo mix: Follow the manufacturer’s guidelines for mixing the terrazzo material. Ensure that it has a consistent and workable texture.
Pouring: Once the subfloor is prepared, pour the terrazzo mix evenly across the surface. Work quickly and efficiently to avoid any inconsistencies.
10. Finishing:
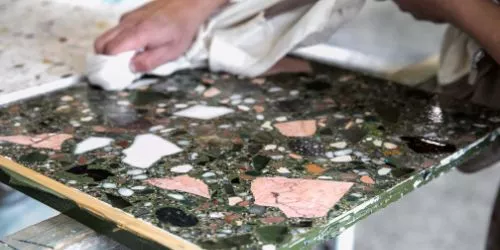
Level and finish: After pouring, use a trowel to level the terrazzo mix and achieve a smooth surface. Pay attention to details such as edges and corners.
11. Curing:
Allow for proper curing: Follow the recommended curing time for the terrazzo mix. This usually involves protecting the freshly poured terrazzo from foot traffic and allowing it to set and harden.
By meticulously preparing the sub floor and following these steps, you can create a solid foundation for your poured terrazzo floor, ensuring both longevity and a stunning visual appeal.